5 min read
Overview
Smart-contracts are the heart and soul of all the development happening on the Ethereum blockchain, and as more and more people develop on Ethereum, smart contracts are becoming more complex.
Sometimes a smart contract wants information about the real world, like the price of ethereum or a basketball game score. When this requirement exists, these smart contracts need to deal with external data, which is known as off-chain data that does not already reside on the blockchain, this data needs to be in the same format as on-chain data. The difficulty with connecting this outside data to blockchain in a language that both on-chain and off-chain sources can understand is limiting smart contracts' extensive usability. As a result, Oracles were introduced into the blockchain ecosystem to bring the off-chain data to on-chain. Oracles retrieve and feed external data to the blockchain and smart contracts via web APIs. But, centralized oracles can diminish the benefits of a blockchain as they can be faulty and alterable. This is where Chainlink comes into the picture. Chainlink aims to provide tamper-proof inputs and outputs for complex smart contracts and connect them to real-world events and data. Chainlink has gained a fair amount of popularity in the blockchain community. The Chainlink network is built on independent node operators, making it decentralized Oracle technology, unlike other Oracle designs that depend on a centralized entity as a gateway. The node operators are rewarded with the LINK tokens for doing high-quality, honest work. Chainlink nodes have job specifications registered with each node to execute jobs coordinated by the on-chain Oracle contracts.
Running a Chainlink node allows you to provide external data directly to smart contracts. In this guide, we will configure our Chainlink node and become a node operator on the Ethereum mainnet.
Prerequisites
- Docker- CE
- Terminal aka Command Line
Setting Up Your QuickNode Ethereum Endpoint
For our purposes today, we could use pretty much any Ethereum client, such as Geth or OpenEthereum (fka Parity). Since that is a bit too involved for getting our Chainlink node running, we'll just set up a free QuickNode account here and easily create an Ethereum endpoint. After you've created your Ethereum endpoint, copy your WebSocket endpoint:
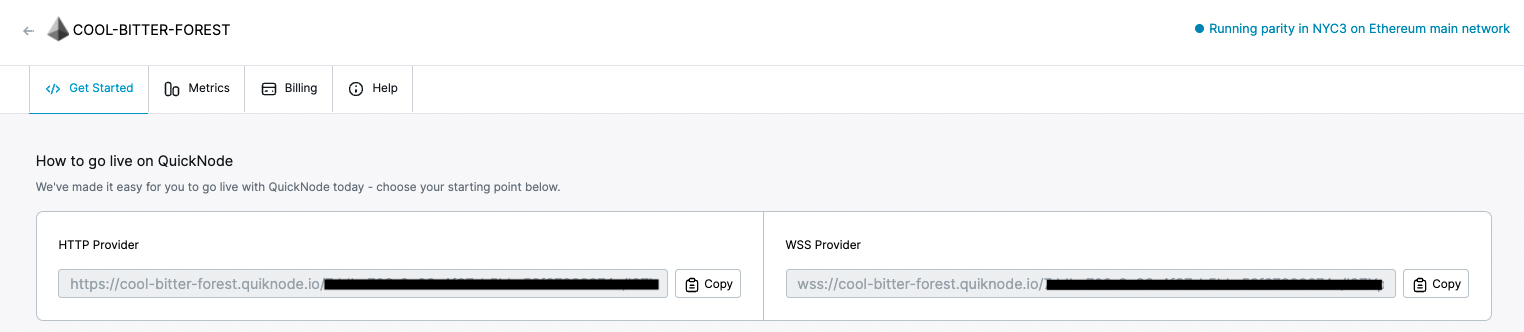
You'll need this later, so copy it and save it.
Booting your PostgreSQL instance
To run a Chainlink node we also require a PostgreSQL database instance, PostgreSQL is an open-source, object-relational database. built with keeping extensibility, data integrity, and speed in mind. Its concurrency support makes it compatible with ACID transactions and it supports dynamic loading.
If you already have a PostgreSQL database set up, get your connection string in the following form-postgresql://$USERNAME:$PASSWORD@$SERVER:$PORT/$DATABASE and you can head to the next section.
Now, let's see how we can set up our own PostgreSQL instance, we'll use DigitalOcean here.
Step 1: Create a DigitalOcean account if you don't have already and sign in.
Step 2: Click on Create in your DigitalOcean dashboard and select databases, this will take you to a page to configure your database.
Step 3: Select PostgreSQL as your database engine under 'Choose a database engine' section, under 'Choose a Cluster Configuration' section select the smallest node with 1GB-RAM-1-vCPU as you can always upscale the node later but cannot downgrade it, you can also select a Standby node in higher node plans for better reliability.
Step 4: Select a region for your database under the section 'Choose a datacenter', always choose a region your app servers are in or nearest.
Step 5: In the 'Finalize and Create' section there will be an auto-generated name of your database, you can type in a name of your choice too, select a DigitalOcean project your want this database under and even give tags.
Step 6: Now you'll see the database control panel, select "connection string" in the top-right drop-down, and a string will be displayed which we'll use in the latter part of this guide. You can also find your database control panel after you log in to your DigitalOcean account go to the Databases page, then select the name of your database cluster.
Making sure Docker is installed
By now, you should have Docker-CE installed, if not type the following in your terminal aka Command Line (for Ubuntu):
For Ubuntu:
$ curl -sSL https://get.docker.com/ |
sudo usermod -aG docker $USER
exit
For macOS: Docker-CE comes with Docker Desktop which can be downloaded from Docker hub, install Docker Desktop and open the Docker.app and the Docker is running.
For Windows: Docker-CE comes with Docker Desktop which can be downloaded from Docker hub, install Docker Desktop and open the Docker.app and the Docker is running.
Running our Chainlink Node
Next, as we have Docker-CE installed, let's start setting up our Chainlink node by making a new directory:
$ mkdir .chainlink
After that, please make a .env file in your chainlink directory and paste the following in it:
ROOT=/chainlink
LOG_LEVEL=debug
ETH_CHAIN_ID=1
CHAINLINK_TLS_PORT=0
SECURE_COOKIES=false
ALLOW_ORIGINS=*
ETH_URL=ADD_YOUR_ETHEREUM_NODE_URL
DATABASE_URL=postgresql://$USERNAME:$PASSWORD@$SERVER:$PORT/$DATABASE
Now, please replace ADD_YOUR_ETHEREUM_NODE_URL with the WebSocket endpoint from the instructions in the section titled "Setting Up Your QuickNode Ethereum Endpoint" above.
The last step here is to replace `postgresql://$USERNAME:$PASSWORD@$SERVER:$PORT/$DATABASE` with the connection string of your PostgreSQL database we got from instructions in the section titled "Booting your PostgreSQL instance" above.
A quick explanation of the code above - ROOT specifies the root directory (line 1), LOG_LEVEL describes the level of logs you want to retrieve (line 2), ETH_CHAIN_ID describes the network id of the ethereum network we're using '1' here as we're using mainnet (line 3), ETH_URL is the variable to store the endpoint (line 7), $USERNAME is the Database username (must be an owner) $PASSWORD is the database user's password $SERVER server-name or IP address of your database server $PORT port on which database is listening $DATABASE the database you are using (line 8).
Start our Chainlink node
We can now run the Docker image of your node by:
$ cd ~/.chainlink && docker run -p 6688:6688 -v ~/.chainlink:/chainlink -it --env-file=.env smartcontract/chainlink local n
While running the image first time, it will ask you for a password and confirmation. This will be your wallet's password that can be used to unlock the keystore file generated. then you'll have to enter an API Email and Password, it will be used to expose the API for the GUI interface.
That’s it! your Chainlink node is now all set up now and you can now interact with the smart-contracts on chainlink network and Blockchain.
Subscribe to our newsletter for more articles and guide on Ethereum. If you have any feedback, please feel free to reach out to us via Twitter and you can always chat with us if you have a question via our community server on Discord, thanks :)