3 min read
Overview
As decentralized finance and smart contracts continue to grow on Ethereum and EVM-compatible blockchains, the need for a reliable and secure non-custodial wallet is more important than ever. Brave Wallet, integrated into the Brave browser, offers a native, privacy-focused option for these activities. By default, wallets like Brave Wallet rely on public RPC nodes, which are generally reliable but rate-limited, so having a custom RPC provider is always a better option.
Importance of Using Custom RPC Provider
Relying on public nodes can lead to unexpected delays due to high traffic or maintenance periods. By using a custom RPC provider, you get dedicated access to a dedicated cluster, potentially reducing latency and ensuring a more consistent online experience. This is particularly valuable for users who need the most up-to-date blockchain information at all times.
In this guide, you’ll learn how to connect a custom RPC provider to your Brave Wallet for an optimized experience.
The steps provided below apply not only to Ethereum but also to EVM-compatible (e.g., Polygon, Tron) and non-EVM networks (e.g., Solana) supported by Brave Wallet.
What is Brave Wallet?
Brave Wallet is a non-custodial wallet built into the Brave browser, offering a high level of convenience and security. It enables users to manage their digital assets, interact with dApps, and stay in control of their keys without third-party involvement. As a browser-integrated wallet, it eliminates the need to install additional extensions, reducing security risks and improving performance.
Creating an Endpoint on QuickNode
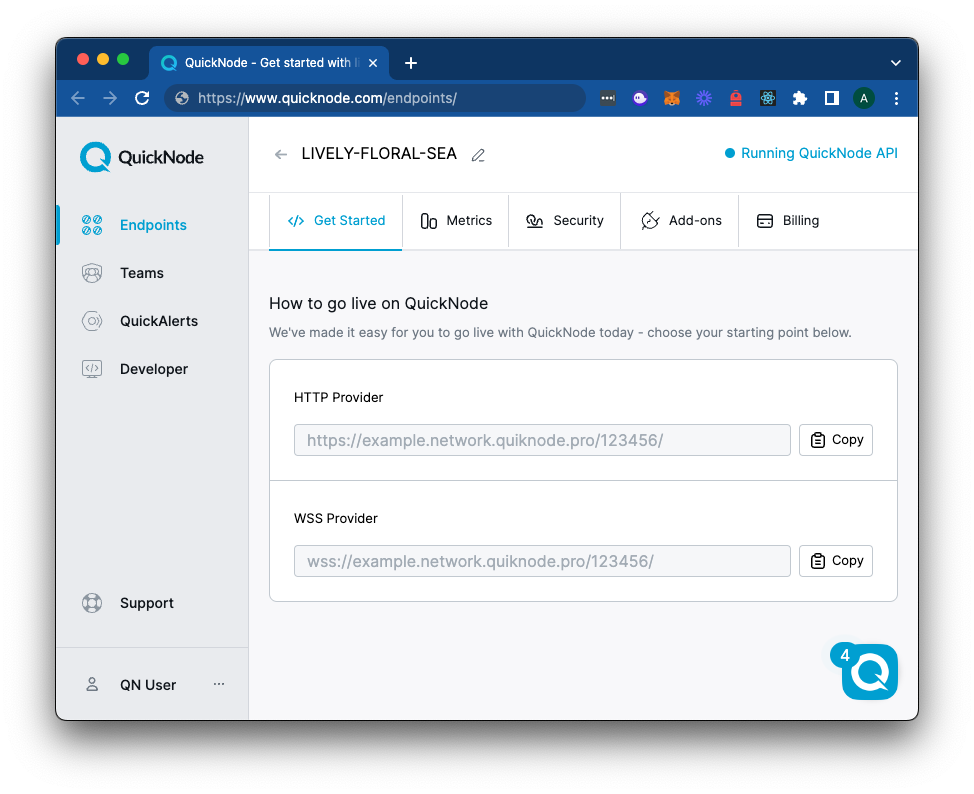
Create a free account on QuickNode to get started. Navigate to Create an endpoint, select your desired chain and network, and finalize the setup.
After creating your endpoint, copy the HTTP Provider link and keep it handy, as you'll need it next.
Setting up Brave Wallet with a Custom Provider
Download the Brave browser if you haven’t already. Then, click the Wallet icon in the toolbar to get started. Create a new wallet or import your existing wallet if you have one. Make sure to keep your seed phrase safe.
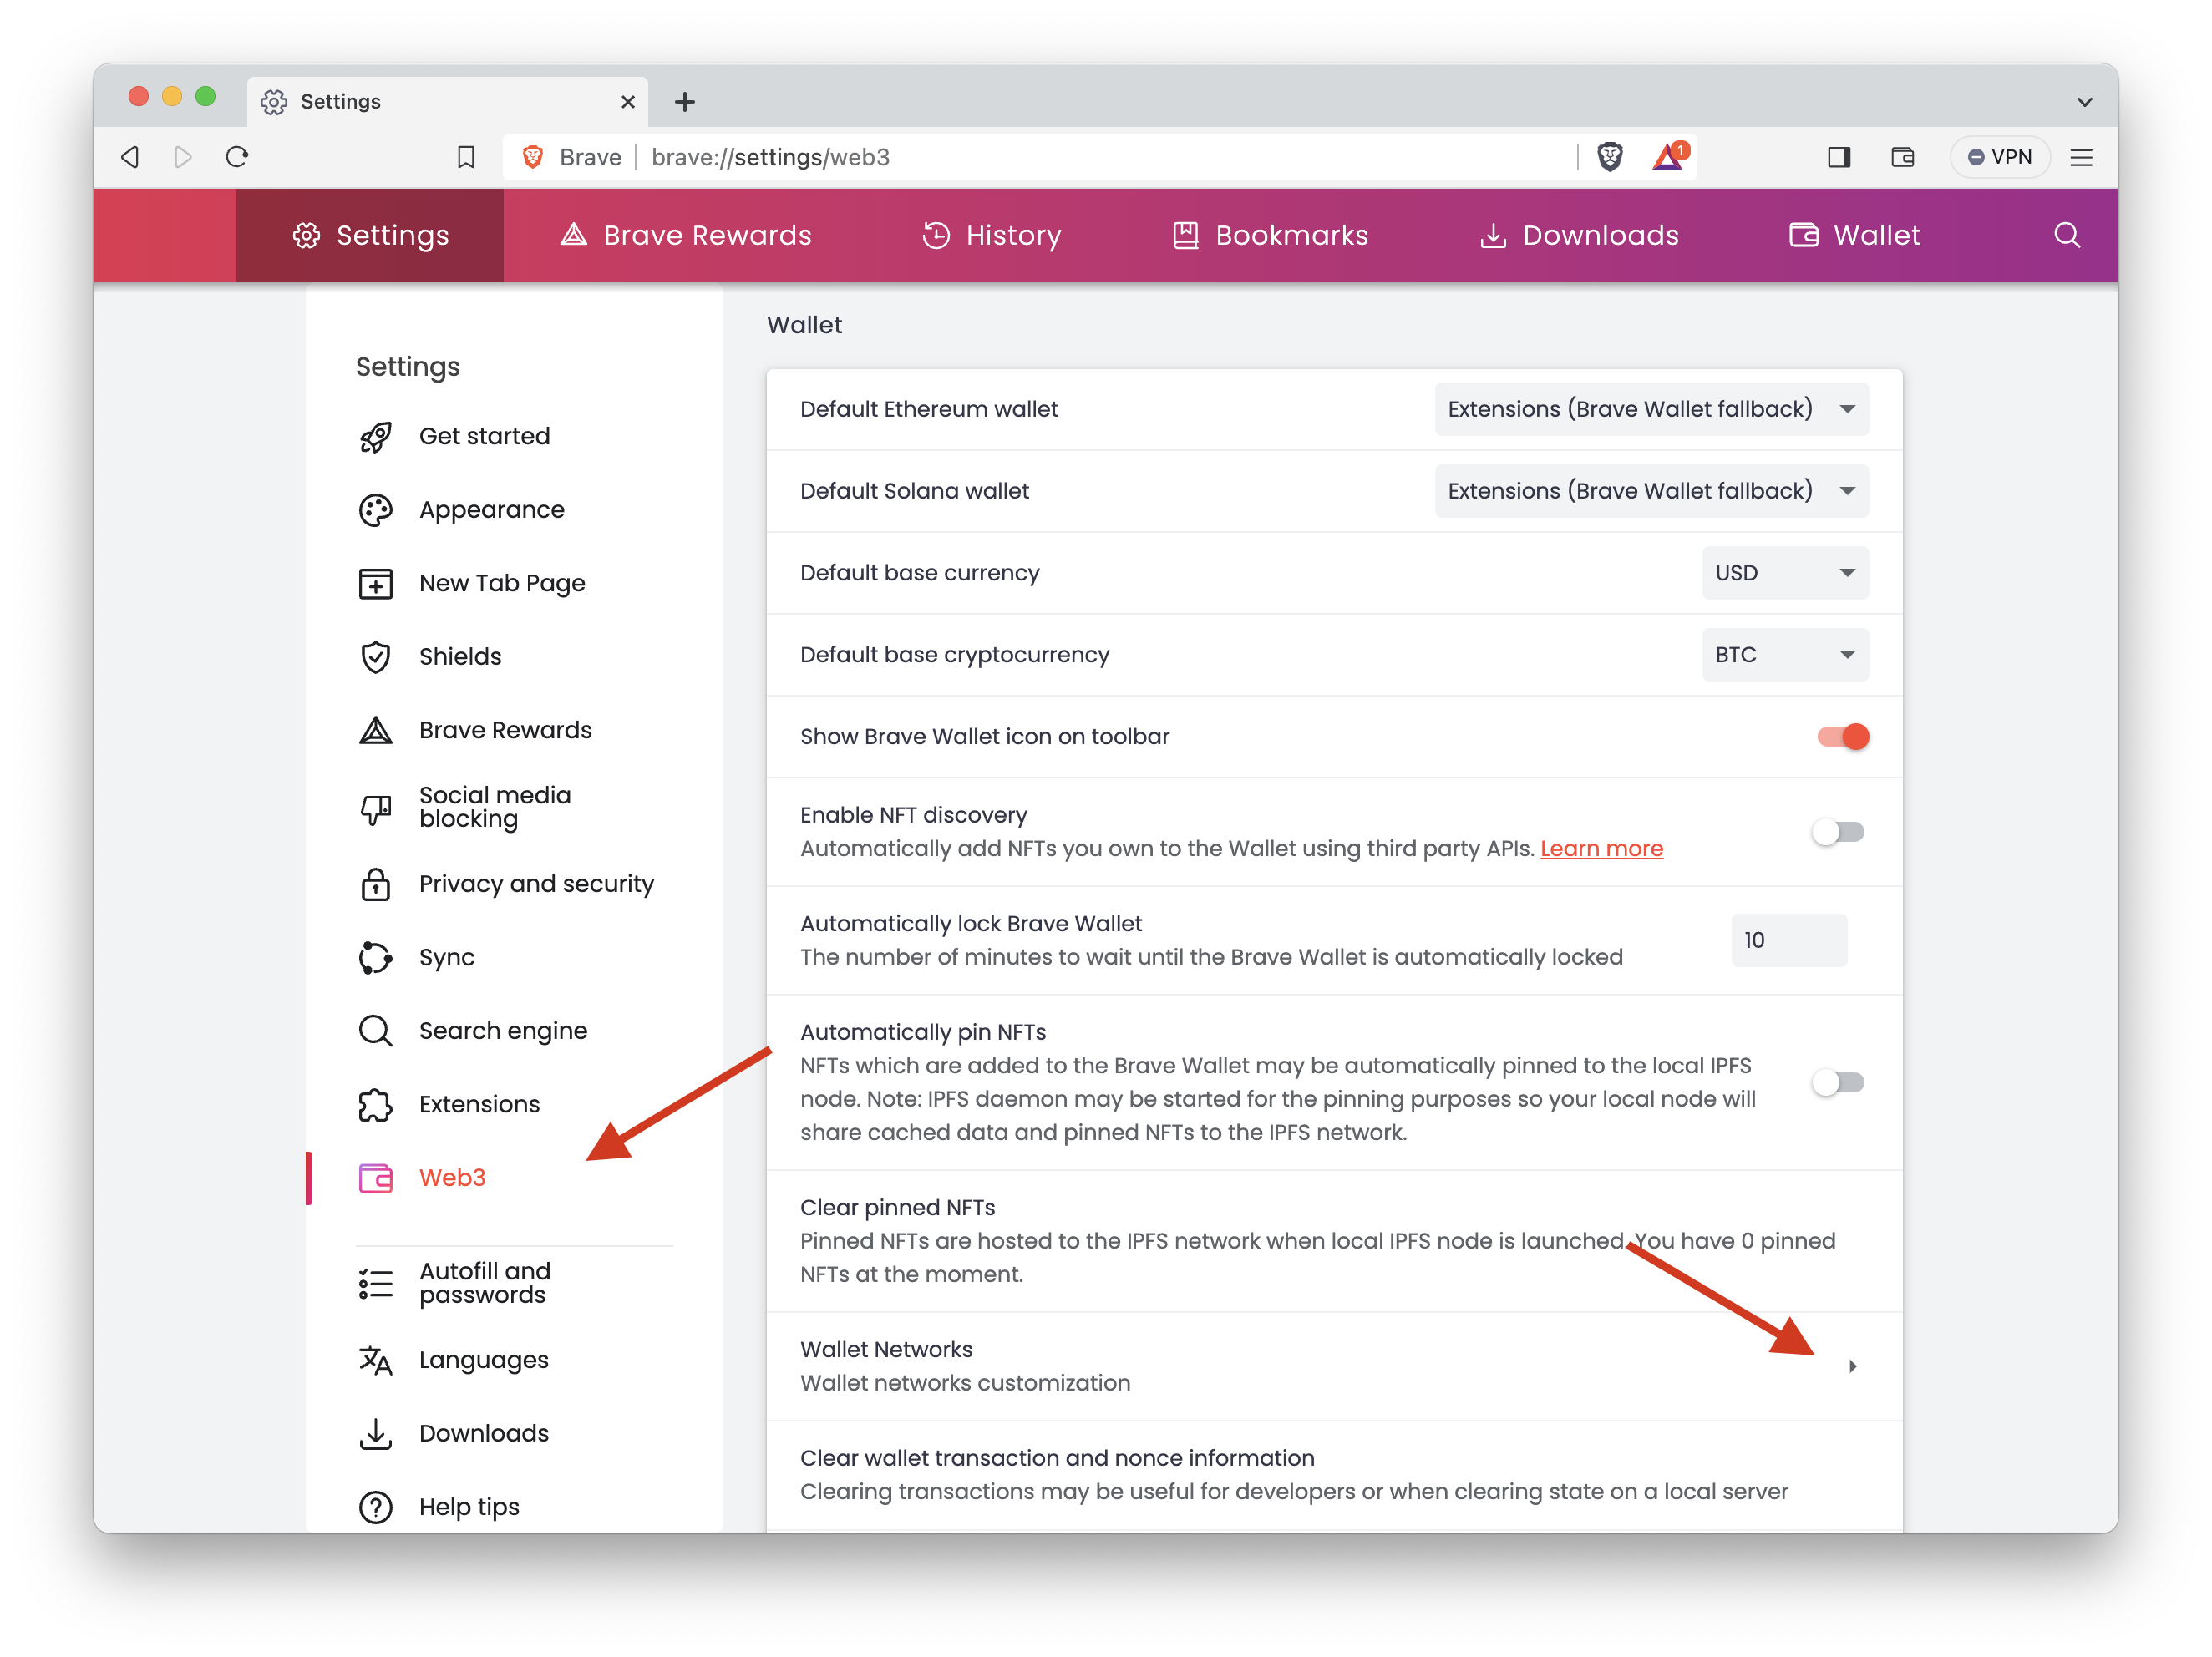
Step 1: To add a network to your Brave Wallet, navigate to your Settings by either entering brave://settings/web3 on the URL search bar or by clicking the (≡) sign on the right side of your Brave browser. Then, on the Web3 tab, click Wallet Networks.
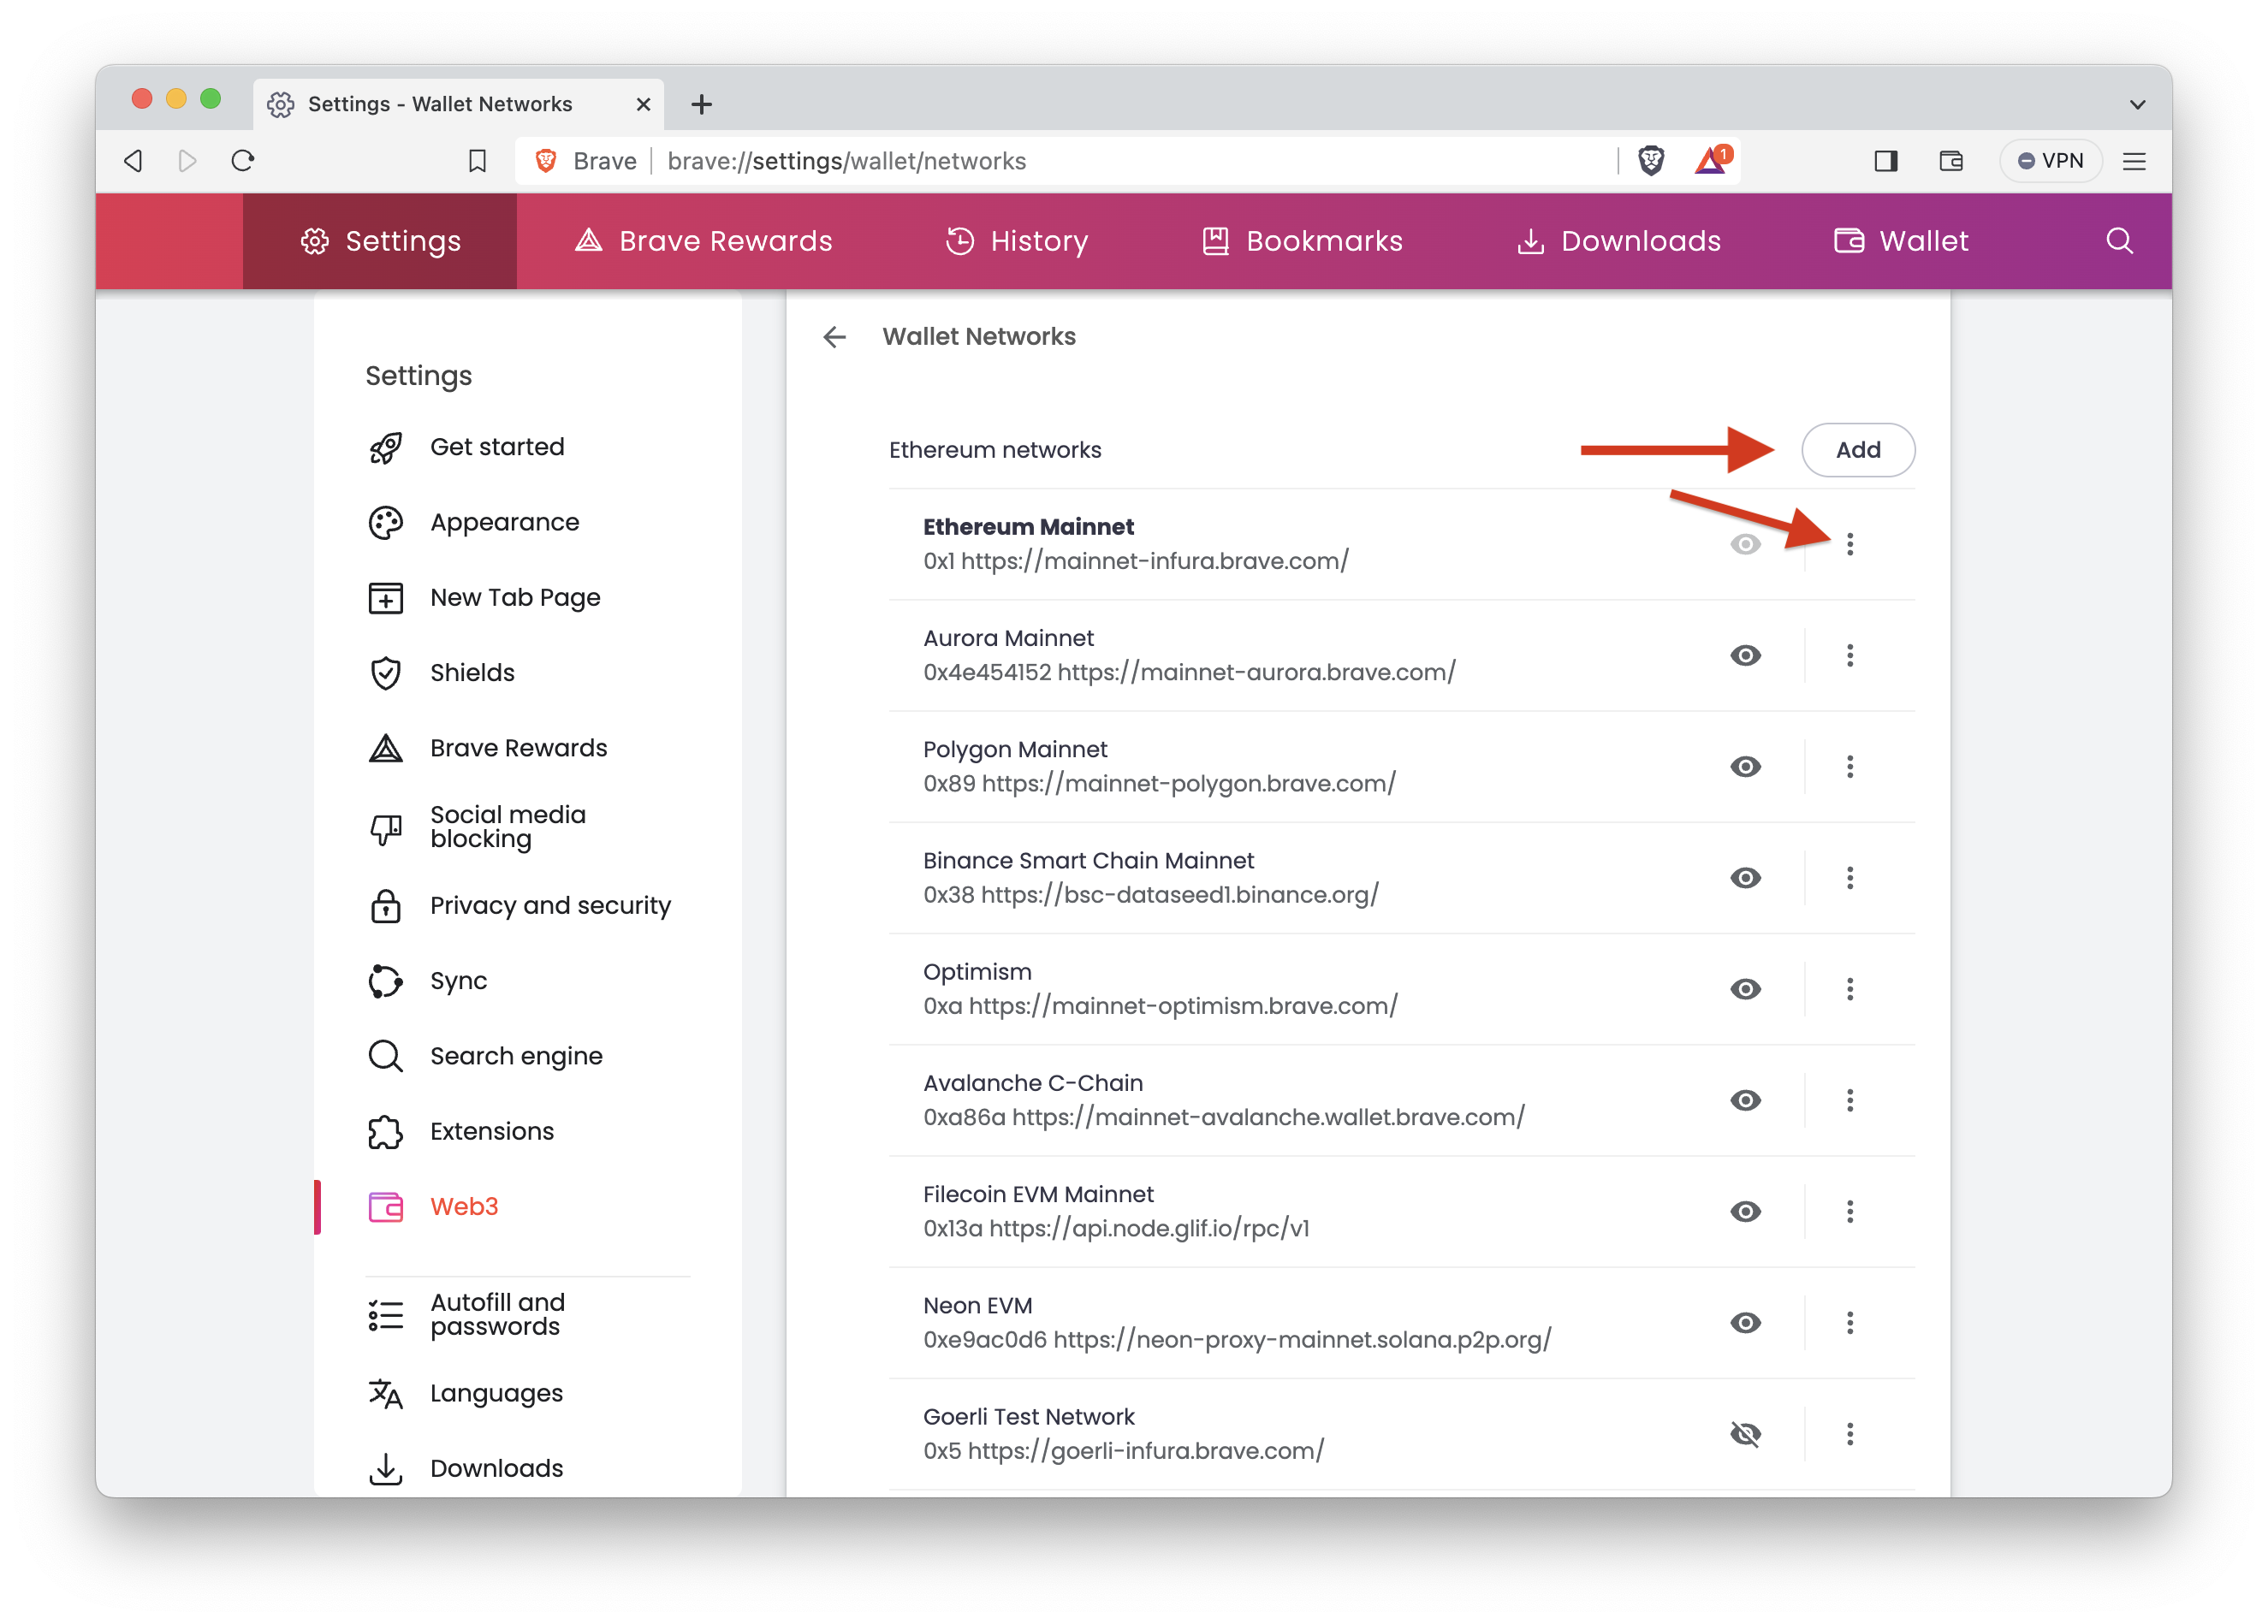
Step 2: On the Wallet Networks tab, you can edit or add new custom networks. If you want to change the RPC for a pre-defined network like Ethereum, click the (⋮) on the right side of the network that you want to edit and click the Edit button. Otherwise, click the Add button.
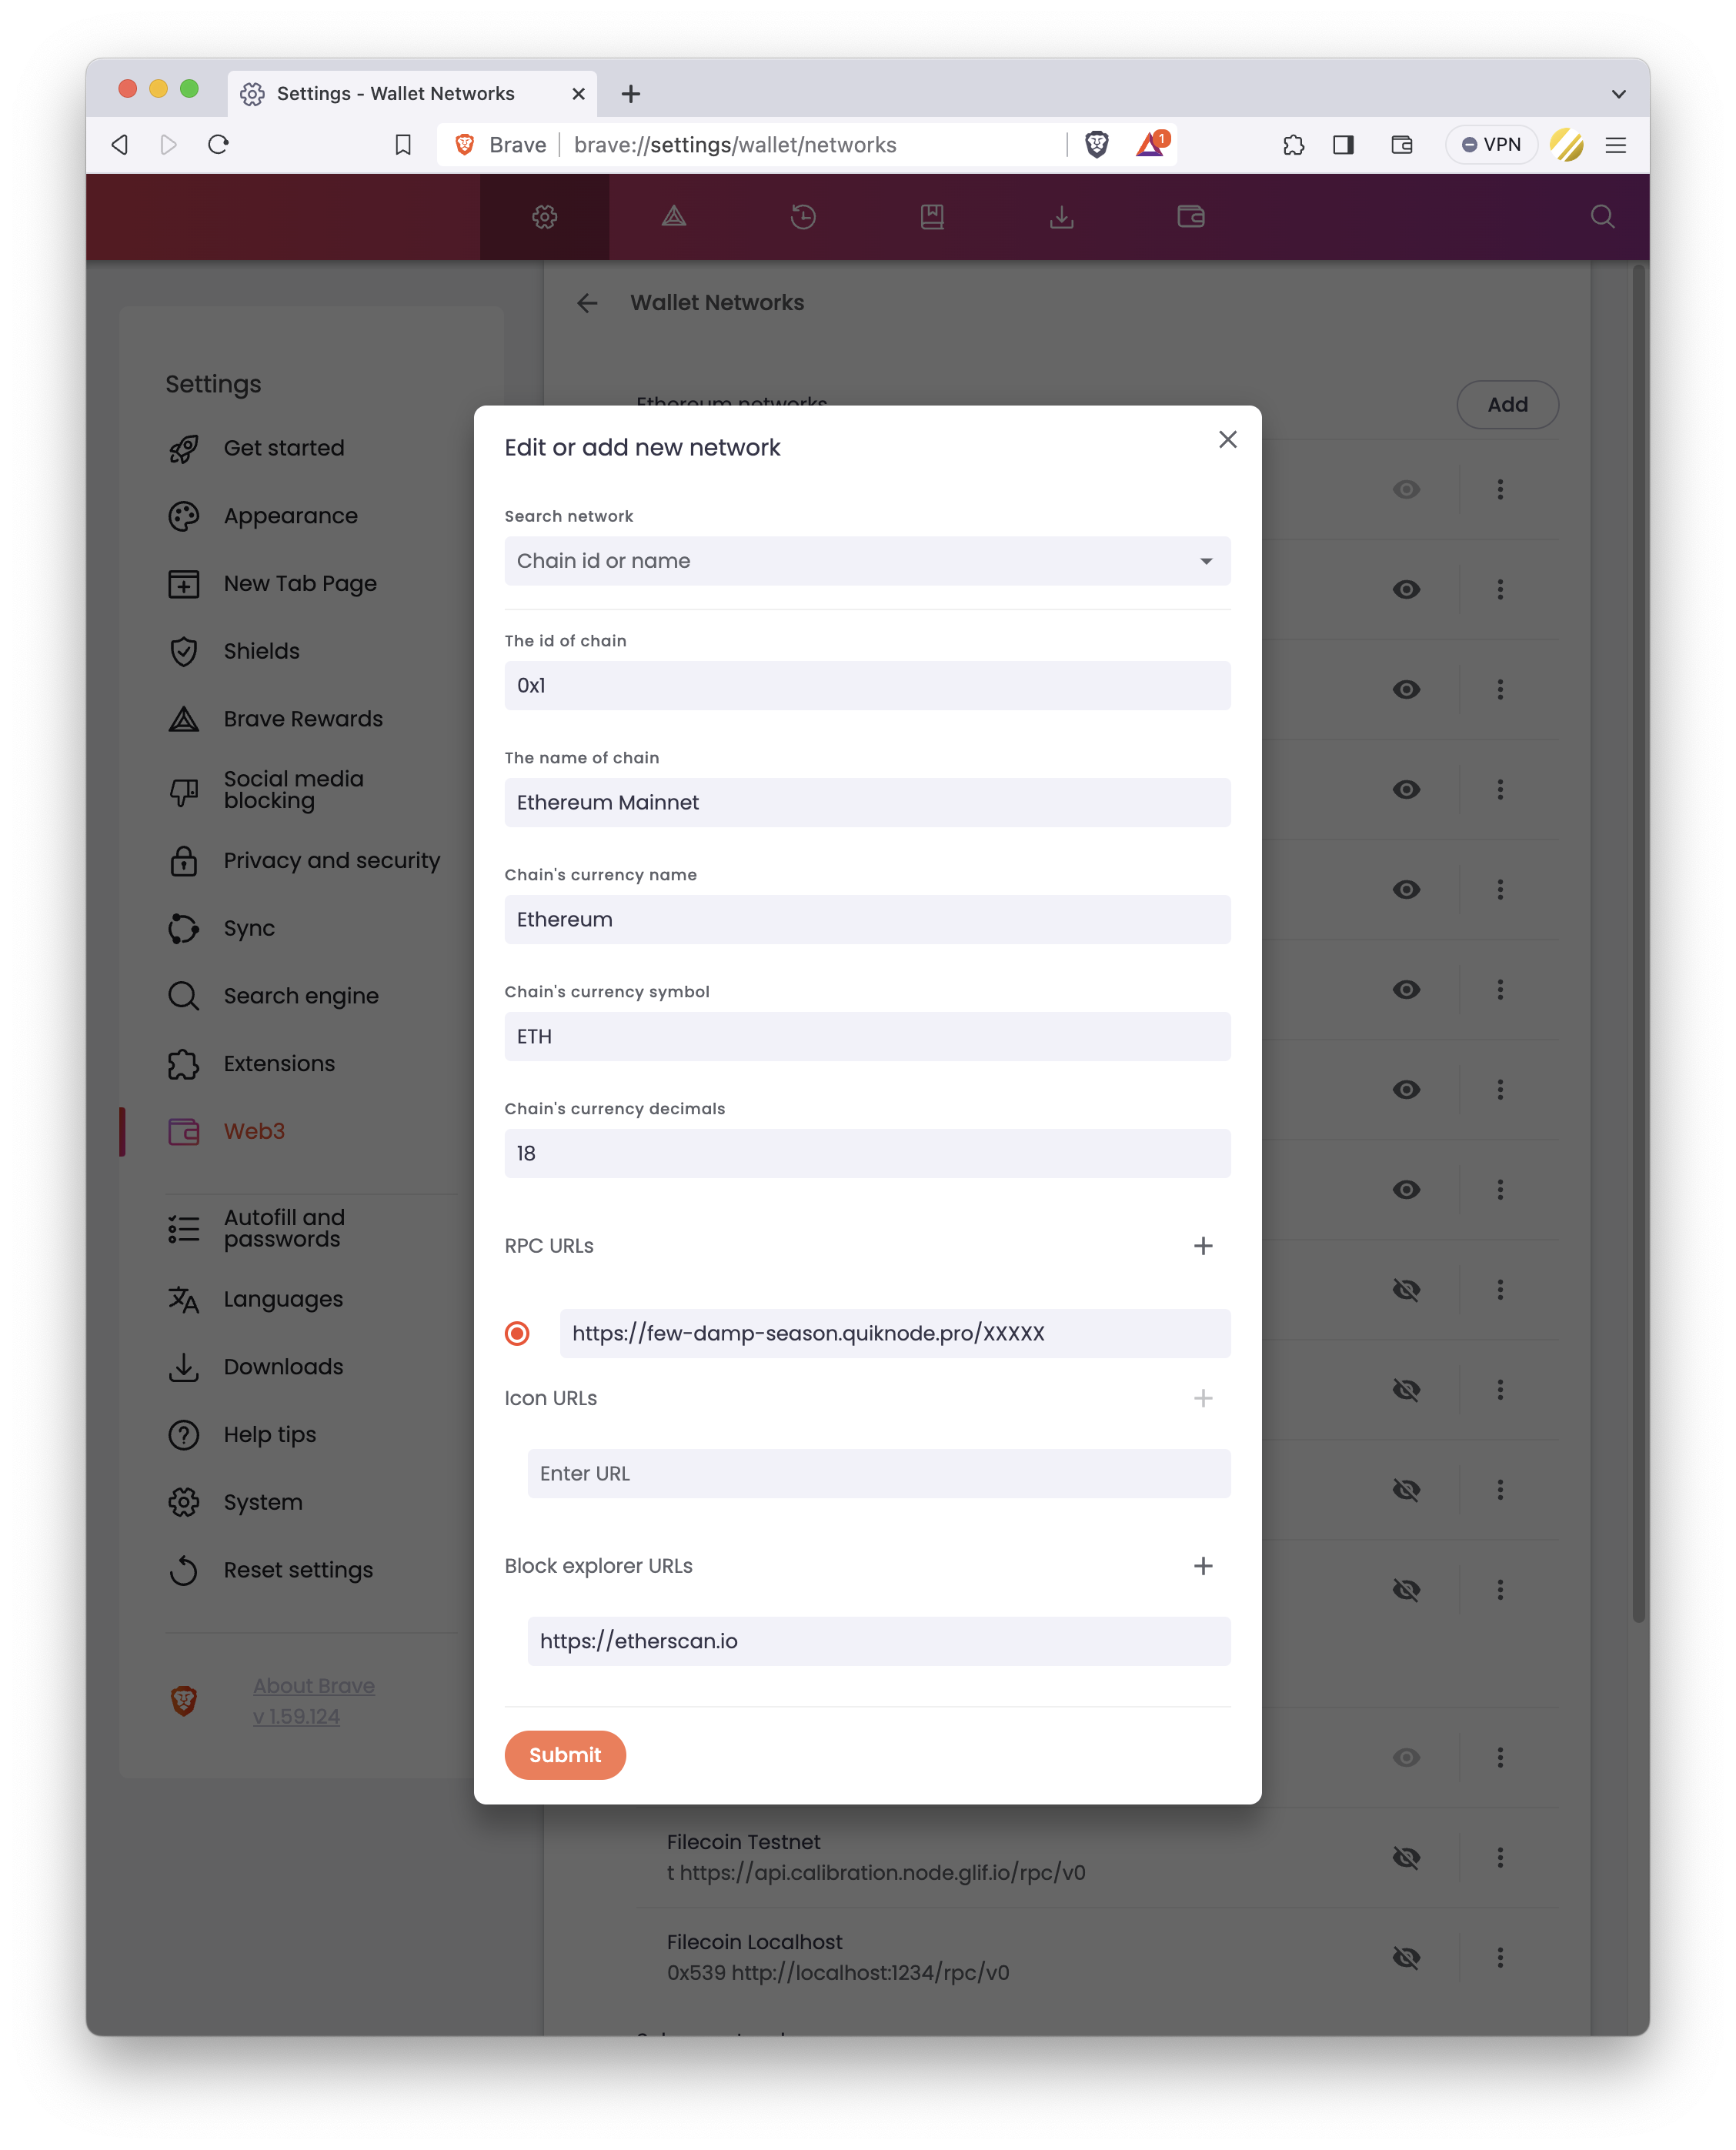
Step 3: If you want to change the RPC for a pre-defined network like Ethereum, paste your QuickNode endpoint URL in the RPC URLs. If you want to add a custom network, enter the custom network's relevant details and your QuickNode endpoint URL in the fields. Then, lastly, click Submit.
Refer to ChainList to get the relevant details of the blockchain that you want to use.
Congratulations, your Brave Wallet is now enhanced with your own QuickNode RPC connection, offering you greater control and efficiency.
If your QuickNode account supports more than one endpoint, you can repeat the same process for other networks as well.
Conclusion
You have successfully integrated a custom RPC provider into your Brave Wallet via QuickNode, setting the stage for a more seamless and reliable web3 experience. With this upgrade, you can navigate the blockchain world with enhanced speed and stability.
If you have any questions, check out the QuickNode Forum for help. Stay up to date with the latest by following us on Twitter (@QuickNode) or Discord.
We ❤️ Feedback!
Let us know if you have any feedback or requests for new topics. We'd love to hear from you.